Just a heads up that we also have a longer, more detailed composting guide called Composting 101 that you can find here. In it we dive deeper into why landfills create methane, the EPA’s Food Recovery Hierarchy, and other details. This quick-and-dirty guide, on the other hand, is meant to be the “just tell me what to do” breakdown for getting started without overwhelm. Now let’s dig in!
Composting is good for the planet.
In a landfill, compostable organic waste quickly stops breaking down efficiently and starts releasing methane gas into our atmosphere. Properly caring for the same compostable organic waste at home does a lot to reduce emissions, and provides rich, nutritious material for your garden.
But simply putting your scraps in a pile doesn’t do much — there are techniques to composting that will keep your pile breaking down smoothly. Don’t worry though! It’s easy once you have the basics down.
Side note: Not all people are able to keep a compost pile at home, or you may not have a garden to use your compost in once it turns back into soil. Gainesville is a great place for composters like this, because of our local (self-proclaimed) ‘stanky-boys’ over at Beaten Path Compost, an organization that offers affordable compost pick ups and drop offs in the area. If you’re not sure how to fit composting into your lifestyle, but don’t want to send food waste to the landfill, we definitely recommend checking their services out.
Psst: If you prefer a print format, or want to gift this information (& far more!) to a curious friend, consider a Home Composting Made Easy ‘zine!
Starting Your Pile
If you have the space and resources to have your own backyard compost pile, there are a few different ways you can go about it.
Your first decision is going to be whether or not to have your compost touching the ground or in an above-ground container like a tumbler.
Tumblers make it easier to turn your pile, which is necessary to maintain proper aeration and prevent anaerobic decomposition, which releases methane gas. You can buy a simple compost tumbler, or make your own. If you keep your pile on the ground, you can also turn a pile by mixing it up with a pitchfork, or by shoveling it all onto a tarp and then dumping it back onto the ground.

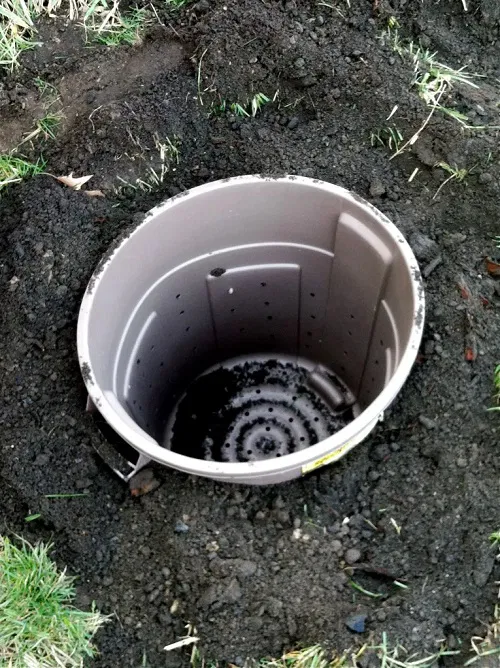
Piles that are connected to the earth allow microorganisms, insects, and worms to help with the process. It’s a great way to give back directly to your own backyard ecosystem! These piles still need to be turned and maintained, though, so try to not just forget about them.
Here’s an extra tip: if you have an above-ground container, you may be tempted to try and replicate that microorganism heaven, but resist the urge to add worms to your tumbler. Compost gets pretty hot when it’s breaking down, and the enclosed space could easily become a death trap for little crawlies when they can’t access fresh, cool air.
Compost bins take many forms and sizes, and many are very easy to make yourself, with anything from a small wire trash can from an office supplies store to chicken wire and lumber. Check out one simple DIY here.
What to Compost
Now that you have a receptacle, you need to know what to put in it. All compost piles have browns and greens. In general, you want to have more browns than greens. A good starting ratio is 3 parts brown to 1 part green.
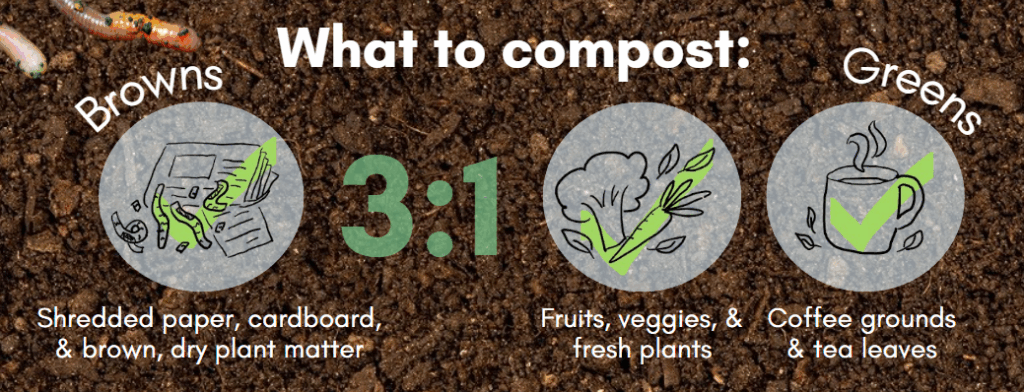
Browns are generally dry plant-based material, like dead leaves, shredded paper, and cardboard pieces. Browns are carbon-rich.
Greens are usually what goes in your countertop compost bin — things like veggie scraps, fruit peels, tea leaves, eggshells, and coffee grounds. This can also include grass clippings* and manure**. Greens are nitrogen-rich.
*Avoid adding grass or yard clippings treated with pesticides or herbicides, and skip any diseased plants as they can transfer contaminants or pathogens to your finished compost.
**Avoid pet and human waste as they can carry pathogens that home compost can’t reliably neutralize.
If your pile is moist, and smells rich and alive, that’s good! If it’s wet and smells rank or overpowering, you could probably benefit from a little more browns.
It’s also always a good idea to get your material as small as possible before mixing it into your pile, so it breaks down faster once it’s there. Think about it like chewing your food before digesting it. This means shredding paper, crushing eggshells, ripping up cardboard, etc.
What NOT to Compost
Certain materials may seem natural enough to compost, but if you add them to your backyard pile, they’ll attract animals, stink up your yard, or they won’t break down properly.

Pet or human waste, even used natural toilet paper or compostable litter, will make your compost unsuitable for the growth of any edible plants, not to mention have very detectable odors that will attract animals. Only use materials like this if you are an experienced composter who can be absolutely certain that your final product will not be used to grow anything that will be eaten.
Materials like tea bags, coffee pods, and “compostable” cutlery, trash bags, or other household items often need to be sent to a commercial facility. Backyard compost piles just don’t get to the temperatures needed to break down compostable plastics or treated wood. Greenwashing is also rampant when it comes to disposable items made of “compostable” plastic, so it’s generally a safe bet to avoid tossing those into your home compost.
If you’ve got the guts to start adding more materials to your home compost, like meat, oils, bones, etc (again, not recommended for beginners!) try out these compost microbes from Kenkashi, which boast a two week time frame from countertop to usable soil! They’re also helpful for any compost pile that could use some speeding up or some extra help.
Maintenance
It’s a good rule of thumb to turn your pile once or twice a week. As you continue composting, you’ll learn more about how quickly your particular ingredients, environment, and container work, and you’ll get into the swing of turning your pile whenever it needs more oxygen.
A healthy pile is moist, earthy-smelling, and can reach temperatures of around 130 to 160 degrees Fahrenheit in the center, which is quite warm, but normal and part of the process.
If your pile is too dry, add some water and turn it over a few times.
If your pile is too stinky or wet, add brown materials and mix them in. You can also spread your pile out on a tarp in the sun for a few minutes if you are dealing with a lot of excess water.
If your pile isn’t getting hot, add more greens and mix them in.
Harvesting
A well-mixed and well-maintained pile should be finished in about 3-6 months. Left to rot, a pile may take a year or more to turn into usable soil.

You will be able to tell that your compost is done when there are no visible scraps and it looks dark, loose, and crumbly, like soil. It also will no longer heat up while mixing. Check out this blog post for more tips on how to tell when your compost is finished breaking down.
Once you’ve determined that your compost is ready, leave it to rest and cure for at least 4 weeks. While the finished batch is curing, you can add the newest material to a new pile or just take a break. Don’t be alarmed when you come back to it — it’s supposed to shrink to about a third of its size!
Sift your compost to remove items like twigs or produce stickers you forgot to remove, and then enjoy the rich, fertile, product of your labors. Isn’t it just amazing to see that process to completion?
Sources and Resources
ask ifas: Compost Tips for the Home Gardener
Compost Magazine: How to Build an Emergency Wire Compost Bin in 15 Minutes or Less
Beaten Path Compost: Sign Up Today!
We posted a graphic form of this blog on our Instagram! Be sure to follow us there for more quick tips and infographics 💚🌎